

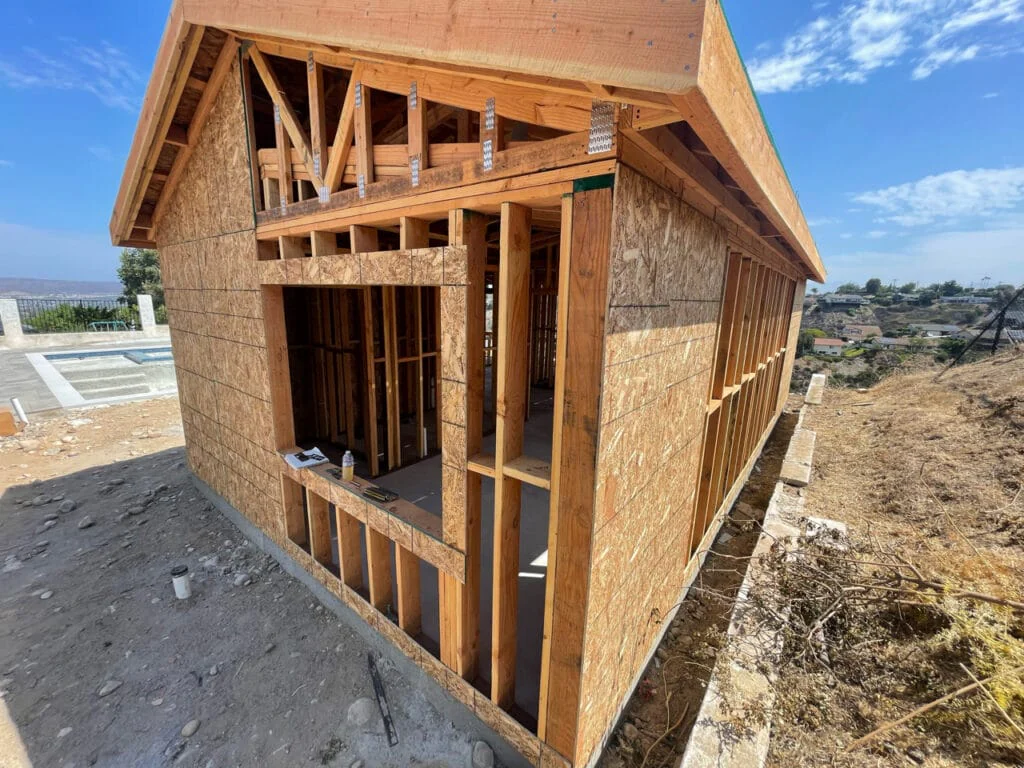
Accessory dwelling units (ADUs) are secondary homes on residential properties, offering homeowners opportunities to boost property value, generate rental income, or house family members while providing complete, independent living facilities.
Understanding the steps and regulations involved in ADU construction in California can feel overwhelming. This guide walks you through the key stages of building an ADU, from zoning and permitting to design and construction. Use these insights to understand the building process and determine how to make it work whether an ADU is worth the investment for you.
What Does ADU Stand For in Construction?
An ADU, or accessory dwelling unit, provides complete, independent living facilities on a residential lot with a primary home.
You may hear incorrect terms such as “additional dwelling unit,” “auxiliary dwelling unit,” or “accessible dwelling unit,” but an ADU is an independent dwelling associated with a primary residence.
What are ADUs Used For?
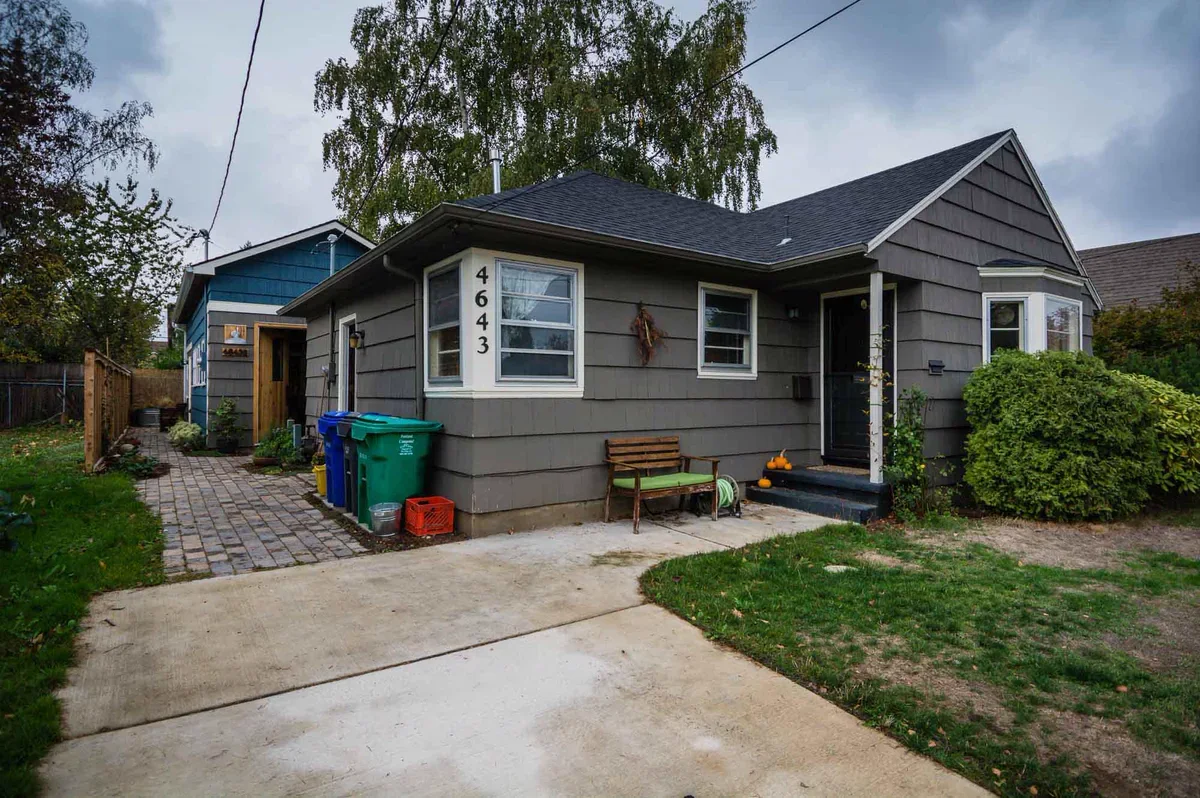
An ADU can serve as a rental, guest home, workspace, or flexible living option while retaining independent living facilities. Common names include granny flat, casita, guest house, companion unit, in-law suite, and carriage house. Regardless of the name, an ADU must meet applicable dwelling requirements.
Is ADU Construction Different Than Other Residential Construction?
Yes. New-construction ADUs present distinct challenges because they combine state and local regulatory requirements with the complexities of adding a structure to an existing residential property.
California ADU laws aim to streamline approval, while HOAs and local agencies establish applicable requirements within state-law limits. Coordinating these rules requires careful review, particularly for design, placement, utilities, and setbacks.
Unlike construction on undeveloped land, ADU building is typically an infill project, meaning the structure must fit around existing features such as homes, driveways, and landscaping.
Tight spaces, challenging grades, and utility constraints can create unexpected hurdles. Evolving regulations and existing site conditions may also lead to unforeseen roadblocks, with schedule impacts that depend on the project and required reviews.
How Does the Cost Compare?
ADU costs also differ. ADU construction can cost more per square foot because specialized planning, utility upgrades, and code-compliance expenses are spread across a relatively small footprint.
Who Can Build an ADU in California?
Homeowners may be able to build an ADU on their property if the project meets applicable state and local requirements. Eligible properties can include single-family homes and multifamily properties.
Although state laws streamline approvals and reduce barriers to ADU construction, local jurisdictions may apply additional requirements where authorized by state law.
Site-specific review is particularly important in areas with geographic or environmental constraints, such as the Coastal Zone or historic districts. Applicable requirements may include required setbacks for the ADU on the property.
Considering a DIY approach? Explore our guidance on ADU shell option.
Benefits of Building an ADU
Building an ADU can offer financial, lifestyle, and long-term benefits, including:
- Increased Property Value: ADU construction adds livable space and may increase resale value while creating income potential. Actual value depends on the property and market. Read about the ROI of an ADU.
- Rental Income: An ADU may generate long-term rental income that helps offset mortgage or living expenses, subject to operating costs and applicable rental rules. See our rental guide.
- Flexibility for Families: Homeowners build ADUs for extended family, aging parents, guests, or adult children. Read our family guide to ADUs.
- Affordable Housing Solution: ADUs add gentle density and can help address local housing shortages.
- Reduced Housing Costs: If you’re looking to downsize, living in your ADU while renting out the main home may help, depending on expenses and rental restrictions.
- Sustainability: ADUs use existing residential land efficiently, and thoughtful design can reduce resource use. Read about sustainable design.
Explore the 8 key benefits of building a backyard home in more detail.
Requirements for Building an ADU in California
Building an ADU in California requires navigating state and local rules. California ADU law allows ADUs on eligible residential lots with an existing or proposed primary dwelling. Begin with the March 2026 California ADU Handbook and current state law, then confirm applicable local requirements within state-law limits. Your project must also comply with ADU building code requirements.
Homeowners should understand that although state laws establish a statewide framework for ADU construction, applicable site conditions, procedures, and lawful local requirements can vary by city or county.
Check your jurisdiction’s official ADU requirements for compliance with state and local law, or work with an expert like Uni Construction to review the requirements for your Los Angeles ADU project.
ADU Construction Types
Before exploring the details of building an ADU, note that the remainder of this guide focuses on stick-built construction, also commonly called wood-frame construction.
This traditional construction method involves building the structure on-site from the foundation up. Stick-built ADUs offer substantial customization and design flexibility, allowing homeowners to tailor the layout, materials, and details to their needs and preferences within budget and regulatory requirements.
Stick-Build Vs Prefab & Modular ADUs
If you’re comparing stick-built, prefab, and modular ADUs, explore our comprehensive guide on Prefab vs Stick Built vs Modular ADUs to understand the advantages, limitations, and practical considerations associated with each construction method.
This guide can help you choose the construction approach that best fits your project’s requirements, budget, site conditions, and anticipated schedule.
Read about attached vs detached ADUs.
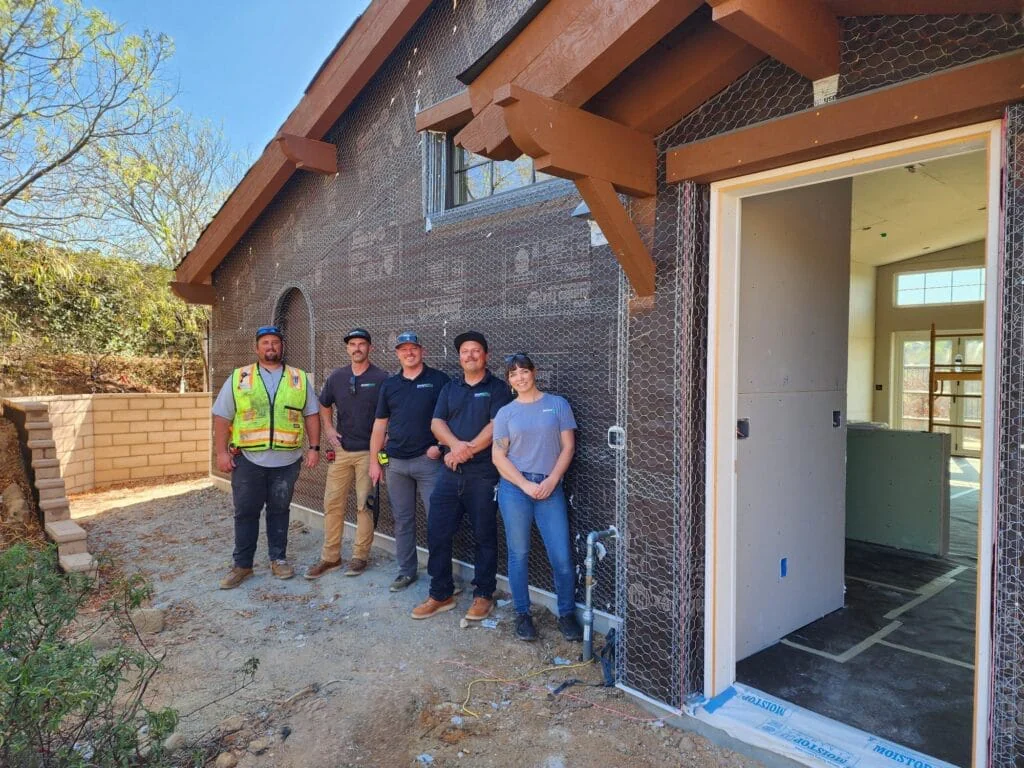
Uni Construction Team During Construction
Step-By-Step Guide to Building an ADU
The ADU construction process includes several major stages, each with specific tasks, potential challenges, and applicable local requirements.
1. Feasibility & Design
Once you decide to explore an ADU, an initial feasibility study helps assess whether the project is feasible within your anticipated budget. This review examines setbacks, zoning, topography, easements, and other conditions that could affect construction. Depending on the property’s condition, additional site work may be necessary, so clarify the expected preparation costs before committing to a design. A small lot in a dense neighborhood may also require a survey, depending on site conditions and agency requirements.
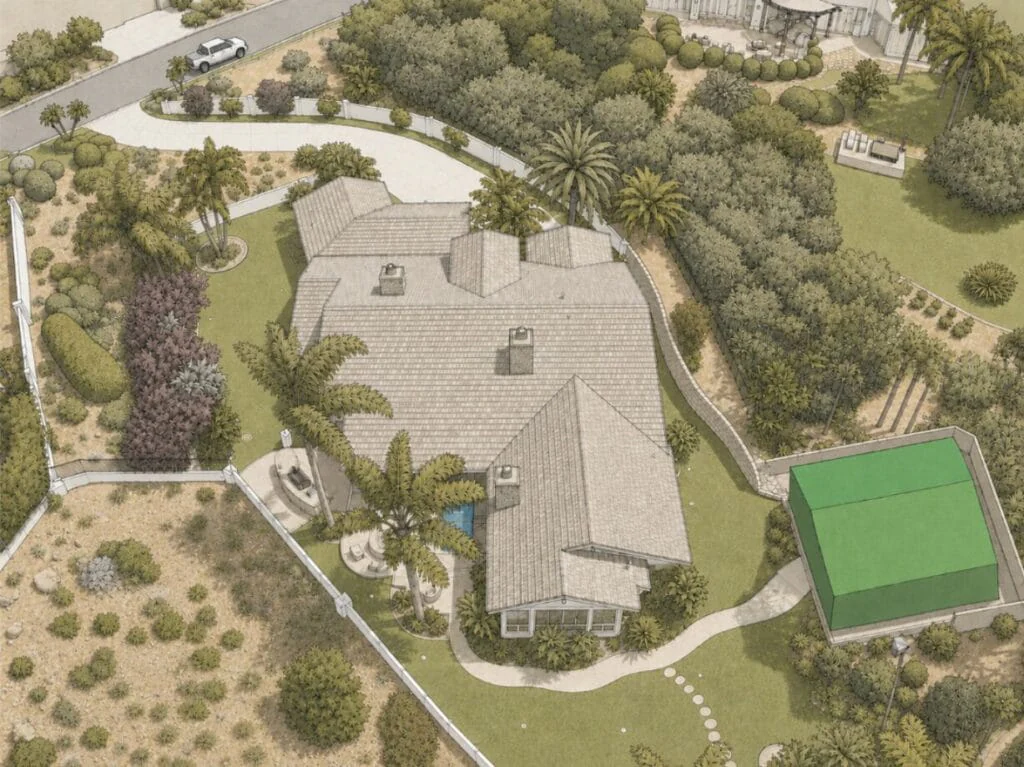
ADU Placement on Your Property
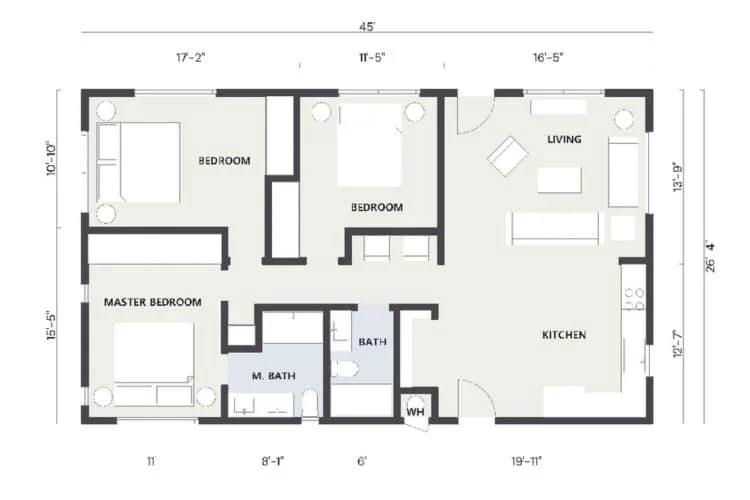
As you determine the best location for the unit, you will also finalize your design for the ADU. Choosing a floor plan requires balancing your budget, available space, and intended use. Consider how you want the ADU to function: would an extra room for hobbies be more useful, or would you prefer a larger living area for entertaining?
Optimizing Your ADU Budget
If you’re working within a strict budget, consider how to get the most usable space and value for your construction costs. These priorities should inform your ADU floor plan. Your contractor can also recommend a layout suited to your unit and property.
Once you have reviewed and approved the ADU design, the project specifications are incorporated into a complete set of construction documents for submission to the appropriate permitting authority.
2. Permitting & Revisions
The permitting process begins with preparing construction documents (CDs) that describe the ADU in detail, from its structural and utility systems to the placement of individual light switches and outlets.
The ADU Permitting Process
The permitting authority reviews the CDs for compliance with applicable regulations and building codes. Reviewers may return comments requesting corrections or additional information, which the project team must address before the permit can be issued.
Your project team should anticipate review comments and allow time to address them. During this period, you can also finalize finish materials so selections, availability, and ordering schedules align with the planned construction sequence.
ADU Permitting Fees
During permitting, expect plan-check charges and permitting fees based on the project and applicable fee schedules. Confirm size-based exemptions, reductions, or other eligibility requirements with the permitting authority and relevant service providers.
Once the required fees are paid, corrections are accepted, and permits are issued, mobilization and construction can proceed according to the project schedule. Read more about how long ADU permits last in Los Angeles, including applicable permit expiration dates and deadlines for beginning construction.
3. Mobilization
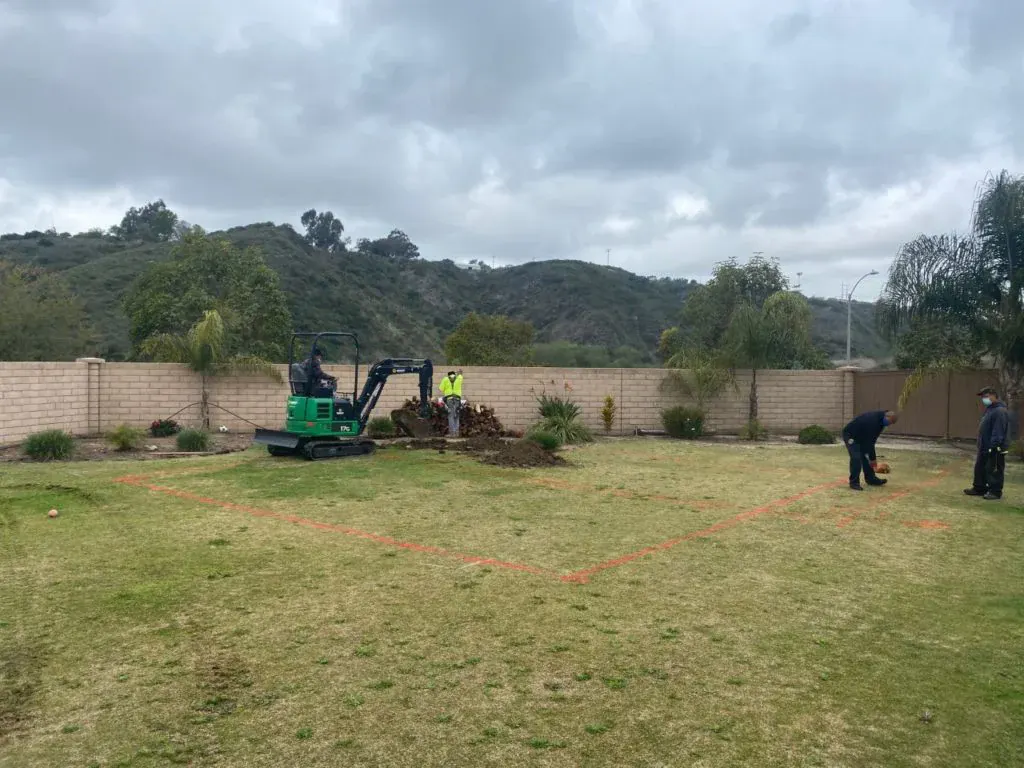
After permits are issued, confirm the mobilization date with your contractor based on crew availability, procurement, and site readiness. The ADU’s footprint is marked with stakes to show its relationship to existing features and identify any site work needed before construction begins.
How the Mobilization Phase Works
Site work may include removing vegetation and rocks or filling depressions as specified in the plans. Temporary toilet facilities may also be delivered during the mobilization phase.
Your project manager will make the approved documents available on-site and meet with you to review the next steps. The superintendent or designated site supervisor will coordinate and oversee on-site work throughout the project.
4. Site Work
ADU construction begins with site preparation and grading to establish suitable conditions for the foundation and building work. This stage commonly includes:
- Site Clearing: Removing vegetation, rocks, and debris that could interfere with construction.
- Grading and Compaction: Preparing and compacting soil for the foundation, with additional work for sloped properties or installing retaining walls.
- Utility Preparation: Installing necessary electrical lines and water and sewer, along with potential electrical panel upgrades or a septic system.
Unexpected challenges, such as unsuitable soil, can emerge during this critical phase. An experienced contractor can help evaluate the conditions, coordinate necessary solutions, and explain their cost and schedule implications.
5. Trenching & Foundation
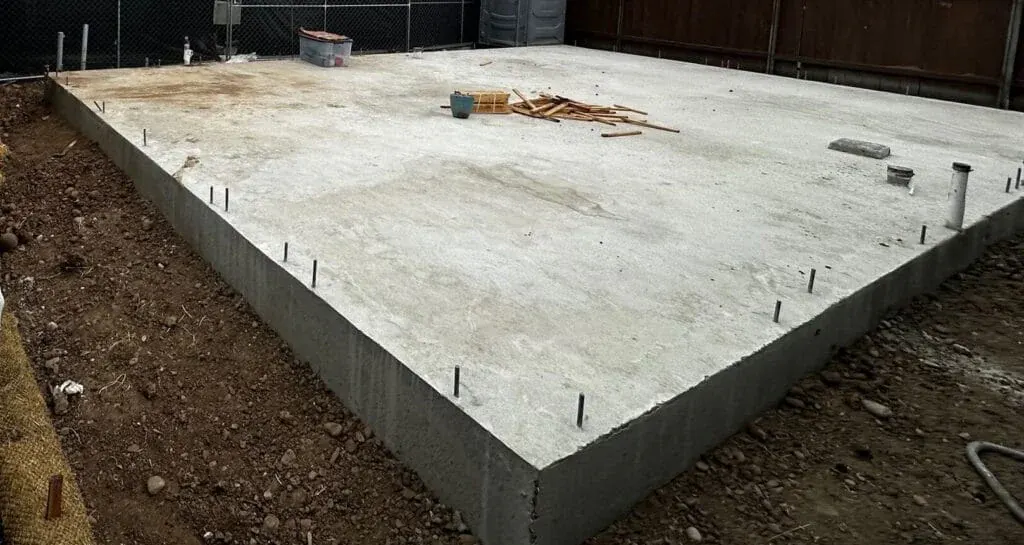
This stage establishes the ADU’s structural foundation. Key tasks include:
- Trenching: Excavating designated areas for foundation footings and underground utility routes.
- Formwork and Reinforcement: Installing forms and reinforcing steel according to the engineered foundation plans.
- Concrete Placement: Placing and finishing concrete to the specified elevations, then allowing appropriate curing.
Proper foundation work supports the unit’s durability and longevity. The appropriate foundation type depends on site conditions, structural engineering, and applicable building codes.
6. Framing
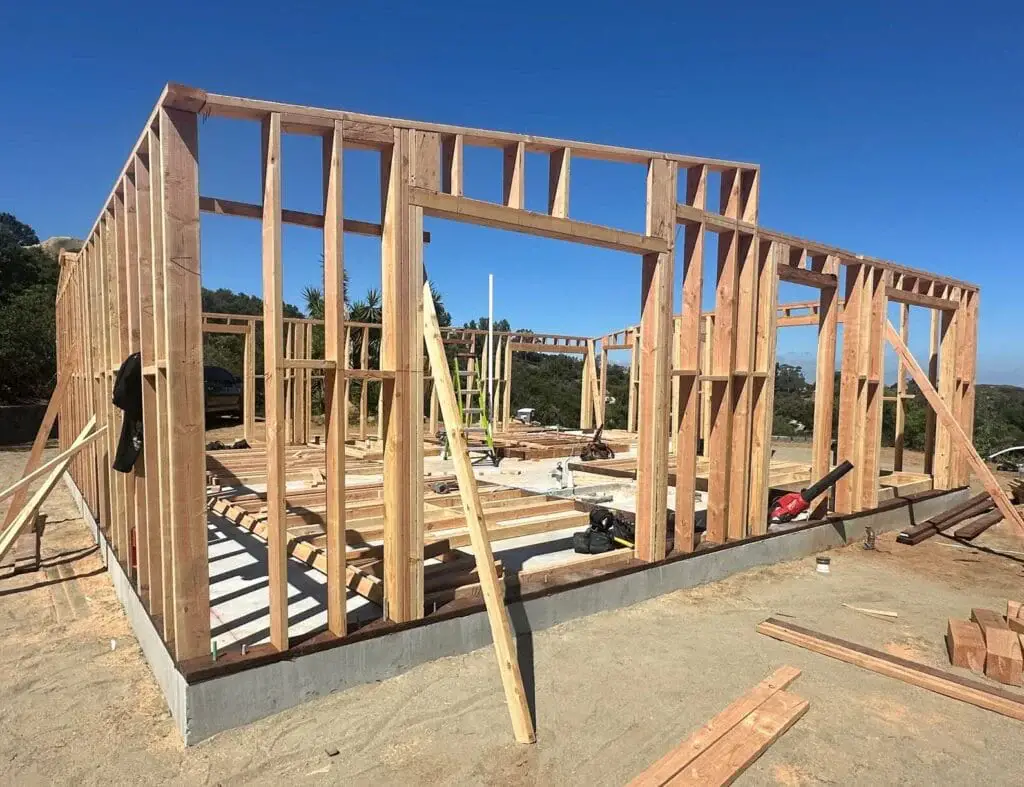
Framing gives the ADU its structural shape and defines its interior spaces. This stage includes:
- Wall and Roof Framing: Installing wall, ceiling, and roof framing according to the approved plans.
- Door and Window Openings: Positioning and sizing openings accurately for later installation.
- Sheathing: Installing structural wall and roof panels for strength and support beneath weather-resistant assemblies.
ADU framing can progress quickly, but precise alignment and connections are essential to meeting building codes and approved design specifications.
7. Rough MEP (Mechanical, Electrical, Plumbing)
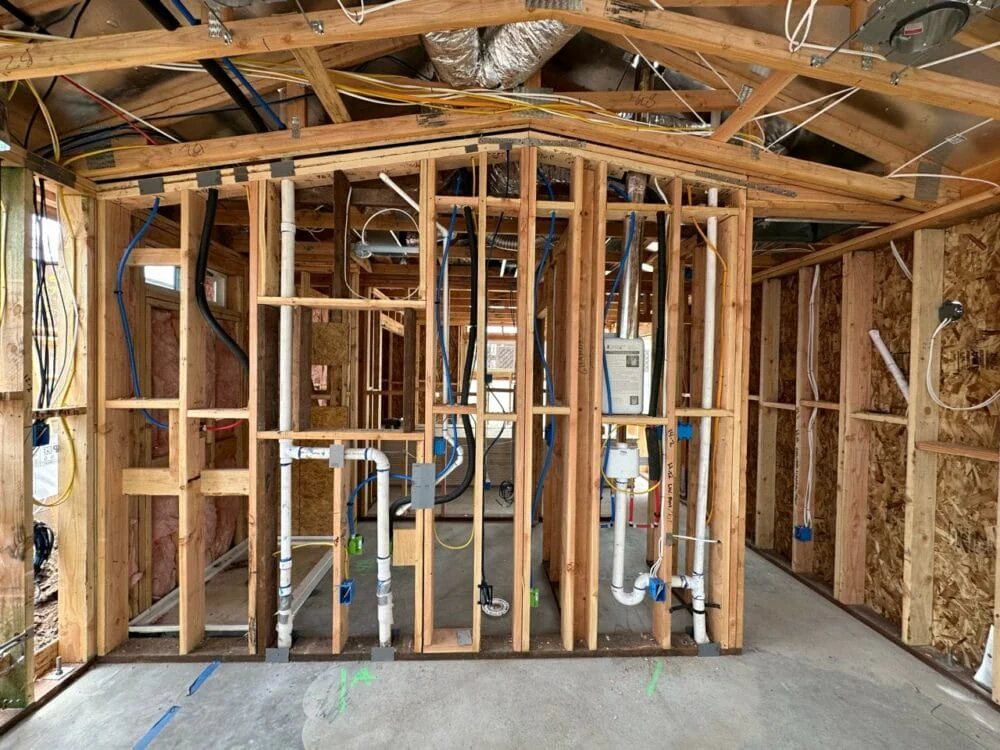
With the structure intact, critical systems are integrated:
- Plumbing Rough-In: Installing water-supply and drainage lines.
- Electrical Rough-In: Routing wiring and installing electrical boxes for the planned fixtures and equipment.
- HVAC Installation: Installing mini-split or forced-air system components for heating and cooling.
This stage installs essential utility systems before required inspections and wall enclosure.
8. Exterior Finishes / ”Water Tight”
During this phase, roofing and exterior assemblies protect the ADU from weather, allowing interior work to proceed when conditions and inspections permit:
- Roofing: Installing roofing materials, underlayment, and flashing to manage water.
- Windows and Doors: Installing units with appropriate flashing, insulation, and security features.
- Siding or Stucco: Applying the specified exterior finish, coordinated with the main dwelling where desired or required.
A weather-resistant exterior allows interior work and exterior detailing to proceed together when conditions permit. Roofing, flashing, and wall assemblies work as a system to protect the structure from rain and moisture throughout subsequent construction stages.
Weather exposure during framing is a common concern, so ask how your builder protects materials and verifies suitable drying before enclosure. Learn more about why rain isn’t an issue for ADU construction and the precautions used throughout construction. Read more about exterior finishes.
9. Insulation & Drywall
Insulation and drywall prepare the ADU for comfort and interior finishes:
- Insulation Installation: Installing insulation in specified walls, ceilings, and other assemblies to regulate temperature and meet energy requirements.
- Drywall Installation: Hanging, taping, and finishing drywall to create smooth interior surfaces.
Some homeowners consider taking responsibility for finish work at this stage. Review our DIY-friendly “tape and texture” ADU option guidance, and confirm the contractor’s handoff point, completed inspections, remaining scope, and responsibility for permits before proceeding independently.
10. Interior Finishes
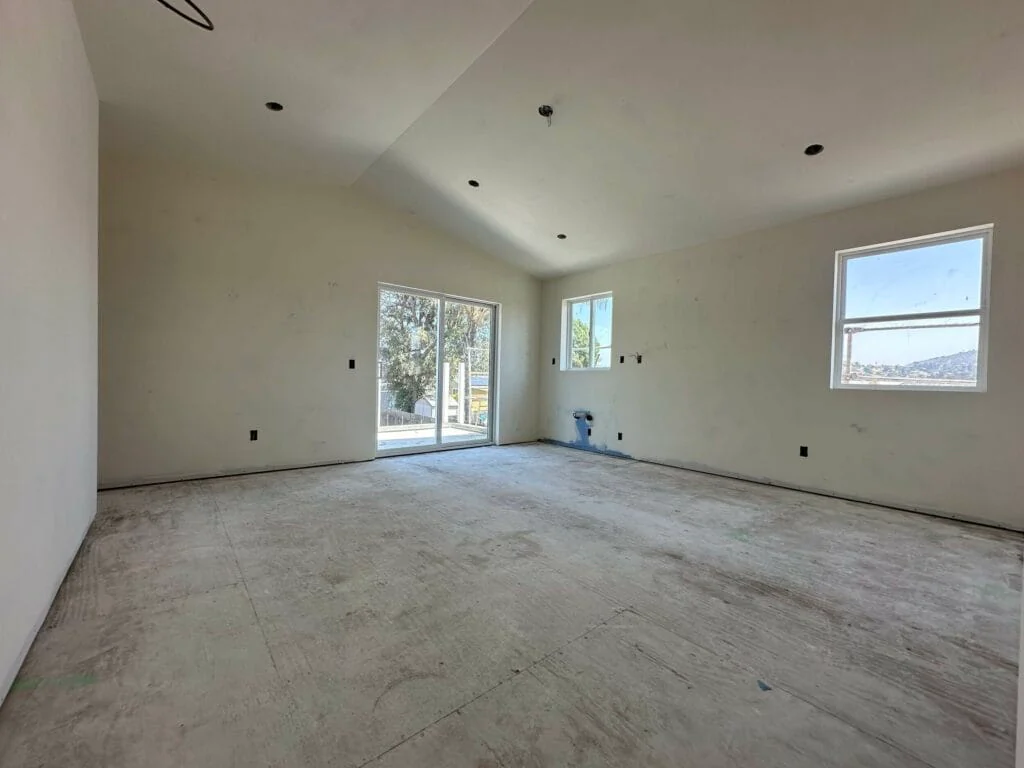
The finishes selected during permitting begin to take shape during this stage of ADU construction:
- Painting and Flooring: Applying paint and installing flooring materials.
- Cabinetry and Countertops: Installing kitchen and bathroom cabinets and countertops.
- Lighting and Fixtures: Installing light fixtures, faucets, and other finishing details.
These finishing touches personalize the ADU and bring your design vision together. Explore completed ADU kitchens and ADU bathrooms for ideas.
11. Final Touches for Building an ADU
The finishing phase ensures your ADU is move-in ready:
- Cleaning and Detailing: Removing construction debris and completing final surface touch-ups.
- Final Inspections: Obtaining required approvals and a Certificate of Occupancy where applicable.
- Landscaping: Improving outdoor areas to complement the new unit.
With required approvals in place, the ADU can be used for its intended purpose. Some homeowners complete landscaping as a separate project phase, provided required site improvements are finished for occupancy. For landscaping ideas suited to your space and priorities, explore outdoor landscaping products.
Read more: How to Prepare for an ADU Build: 7 Steps To Take Before Starting
Factors Contributing to ADU Construction Costs
ADU costs include design, permitting, site preparation, utility upgrades, and on-site construction. The unit’s size, design complexity, applicable building codes, and utility connections all influence the final price. Property conditions and jurisdiction-specific requirements can also require additional site work or specialized construction, increasing overall expenses. A project-specific estimate should account for these factors before construction begins.
ADU Cost Saving Strategies
Homeowners can explore cost-saving strategies such as choosing pre-approved designs, making better use of existing space, or building multiple units simultaneously where feasible to improve construction efficiency. Evaluating these options against site conditions, permitting requirements, and contractor pricing can help you plan effectively and manage the budget.
Read more about ADU cost saving strategies.
Core Costs for Every ADU Build
Regardless of project size or scope, most ADU builds share several core cost categories. Understanding these expenses helps you plan the work from initial feasibility through construction.
- ADU Feasibility Study: A comprehensive feasibility study covering design, surveys, utility mapping, and an analysis tailored to your property and ADU floor plan. This review helps establish the project’s anticipated scope, constraints, and costs.
- Construction Drawings: Architectural design, structural engineering, Title 24 compliance documentation, and revisions needed for permitting.
- Permitting Management: Coordination of the application and review process, from submitting forms to responding to agency plan-check comments.
- Vertical Building Construction: The primary building work, including foundation work, the structure, standard finish materials, and warranty. Costs depend on size, specifications, and design complexity.
- Basic Site Work and General Conditions: Site preparation, trenching, utility connections, and finish grading under the assumed site-access conditions. General conditions may include dumpsters, temporary fencing, toilets, and required signage.
Additional Costs for ADU Builds
Beyond core construction costs, property-specific conditions and jurisdictional requirements can create additional expenses. The amounts depend on your project’s scope, site characteristics, and applicable regulations.
Property-Specific Costs
These expenses depend on your lot’s characteristics and any additional work required by existing site conditions.
- Additional Site Work: Preparation may include demolishing existing structures, grading, retaining walls, or stormwater mitigation. Depending on the scope, these items can substantially affect the total budget.
- Additional Utilities: Confirm whether separate meters, service upgrades, or other electrical upgrades are required with each utility provider. Solar requirements may apply, and some properties may need specialized sewer and water work or septic system installation.
- Additional Vertical Building Costs: Site conditions requiring specialized foundations or fire-rated construction can increase building costs. Custom exterior finishes and compliance with applicable HOA requirements may also add to the price.
City-Specific Costs
Other expenses arise from applicable regulations, agency fee schedules, required reports, and jurisdiction-specific review or building requirements.
- Permits and Fees: Permit fees depend on the jurisdiction, project scope, and applicable exemptions. Request current estimates from the permitting authority, school district, and sewer provider, including any impact, school, or connection fees.
- Property Reports: Depending on site conditions, agencies may require boundary surveys, grading plans, or soils reports. Confirm which reports are necessary for local regulations and include their costs in your budget.
Understanding core and project-specific costs helps you budget more realistically and identify practical savings. Explore ADU costs for additional guidance on planning your ADU expenses.
Contractor Selection and Management
Choosing the right contractor is a critical step in an ADU project. Evaluating relevant experience, verifying credentials, and establishing clear construction-management practices can significantly influence the quality, cost, and overall outcome of your build.
For an ADU project in Los Angeles, we’re happy to work with you. You can also use the guidance below to evaluate contractors serving your property’s jurisdiction.
The Importance of Selecting an Experienced ADU Contractor
An experienced ADU contractor can help coordinate the project and address regulatory requirements. Look for demonstrated familiarity with tight site access, applicable zoning rules, utility integration, and the practical challenges of building alongside an existing home.
Remodeling and new-construction ADUs involve different scopes and challenges. Learn how to find the right ADU builder for your project, and verify relevant experience, current licensing, and insurance. Also review the considerations associated with working with “one contractor that does everything.”.
How to Compare ADU Builder Quotes
When comparing contractor quotes, evaluate the same scope of work, including site preparation, utility connections, finish specifications, and any allowances or exclusions.
Builders vary in how much detail they provide, so request clear explanations of assumptions, allowances, and exclusions before comparing prices or signing a contract.
For help evaluating proposals, read our article on comparing ADU builder quotes, including the scope details, costs, and exclusions to review before choosing a contractor.
Also consider ADU Contractor Red Flags: Warning Signs to Watch Out For. Learn which vague or concerning phrases warrant follow-up questions about your schedule, budget, and goals, and what to ask when evaluating a contractor’s credibility.
Understanding the Design-Build Approach for ADU Construction
A design-build firm can simplify coordination by bringing design, permitting, and construction services together under one contract.
This approach can reduce the need to manage separate design and construction contracts while clarifying communication and accountability. The design-build approach can simplify coordination and help identify design or construction issues before they cause avoidable delays.
The Advantage of Working with Experienced ADU Construction Companies
Ask prospective builders how they organize schedules, task lists, subcontractor coordination, and inspection milestones. Request examples of project-management documents and verify any claimed experience or recognition independently. Uni Construction is a DBA of Orep Development Inc., license 1026926, and Min Kang is CEO. Review the company’s current license record and ask who will manage your project day to day. When evaluating Los Angeles Business Journal Leader of Influence in Construction, focus on verifiable credentials, relevant project examples, and clear contractual responsibilities rather than promotional claims.
A design-build contractor can evaluate design and permitting decisions with construction practicality in mind, helping make the build more predictable. Discuss how the team would quickly recover when needed, and use our blog on 7 habits of top ADU builders as a checklist of issues to review before signing.
Ask how your contractor identifies ADU inspection requirements, incorporates them into the plans, and coordinates with the permitting authority. For your Uni Construction project, confirm responsibility for inspections, corrections, scheduling, and communication so expectations are clear throughout construction.
Work With a Uni Construction Specialist on Your ADU Build
Let us know a bit about your ADU project to discuss feasibility, cost, and timeline for your specific accessory dwelling unit project. You can also learn more about turning your ADU planning process into action.
VIDEO: What to Expect When Building an ADU
Watch the video