

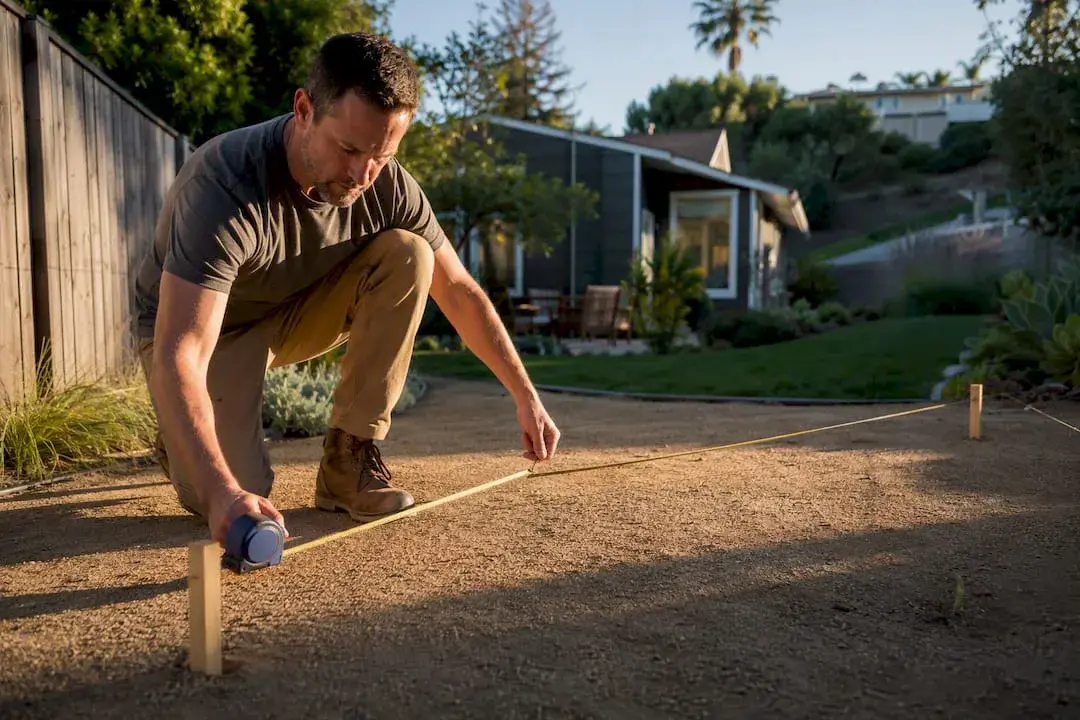
Most backyard lots can support some kind of ADU, but “some kind” is doing a lot of work in that sentence. Before spending a dollar on drawings, confirm three things: zoning allows an ADU at your address, the buildable envelope left after setbacks can actually fit a unit, and water, sewer, and electrical capacity exist or can be added affordably. Pull your parcel and zoning data from your county assessor or GIS portal first, or skip straight to a feasibility consult if you’d rather not decode the maps yourself.
TL;DR:
- Confirm that your zoning allows an ADU, your lot’s buildable envelope can fit the unit, and utility capacity is sufficient or affordable to upgrade.
- Sketch the buildable envelope early by subtracting setbacks, easements, and lot coverage from your parcel dimensions to avoid costly redesigns later.
- Verify utility capacity for water, sewer, electrical, and gas, and ask utility providers for documentation before finalizing plans to prevent unexpected limitations.
- Assess soil stability, slope, drainage, and hazard zones to determine foundation needs and avoid extra engineering review or delays.
- Check neighborhood restrictions such as historic district rules, HOAs, or environmental protections that may impose additional design or placement constraints.
What Goes in an ADU Site Assessment Checklist
A usable ADU site assessment checklist groups items by category so nothing slips through during a walkthrough or permit prep session. Work through each group, mark every line Yes, No, or Not Applicable, and jot a one-line note (measurement, contact name, photo reference) next to anything uncertain.
- Zoning and administrative: Confirm ADU allowance, check owner-occupancy rules, note parcel number and zoning code section.
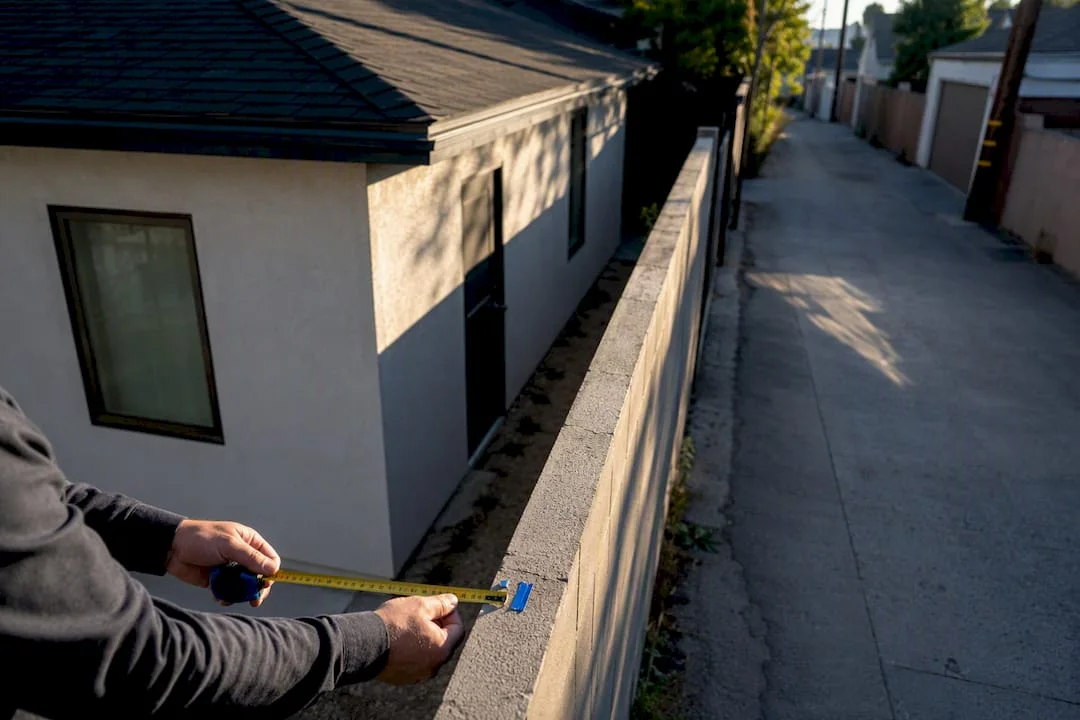
- Setbacks and buildable envelope: Measure front, side, and rear setbacks; flag easements; calculate remaining lot coverage.
- Utilities: Verify water meter size, sewer lateral condition, electrical panel amperage, and gas line capacity.
- Site conditions: Check slope percentage, drainage direction, soil stability, and flood or fire hazard zone status.
- Access and logistics: Confirm equipment clearance, staging area, and any shared driveway constraints.
- Documents on hand: Plot plan, recent survey, utility bills, and any prior permit history for the property.
Pro Tip: Treat easements, missing sewer connections, and slopes beyond your city’s grading threshold as stop signs, not obstacles to design around. Those three issues change the entire scope of the project and usually call for a professional opinion before you go further.
Where Do You Verify Zoning Eligibility for an ADU?
Start with your city or county’s GIS parcel viewer or the planning department’s zoning lookup tool. Most jurisdictions post a parcel-specific zoning designation online, and many now publish ADU-specific policy summaries alongside the base zoning code. The ADU Project Process page from the City of San José is a good example of how cities lay out the step-by-step review path, from an initial checklist through plan upload and inspection scheduling.
Watch for restrictions layered on top of base zoning: owner-occupancy requirements, historic district overlays, caps on total units per lot, and HOA or CC&R language that may restrict a detached structure even where the city allows it.
For your permit file, record:
- The zoning code section that permits the ADU
- Your assessor’s parcel number (APN)
- The planning department contact who confirmed eligibility
- Any pre-approved ADU plan program your jurisdiction references
How Do Setbacks Determine Where Your ADU Can Go?
The buildable envelope is what’s left of your lot after every required setback, easement, and lot-coverage rule takes a bite out of it. Sketch it before you fall in love with a floor plan.
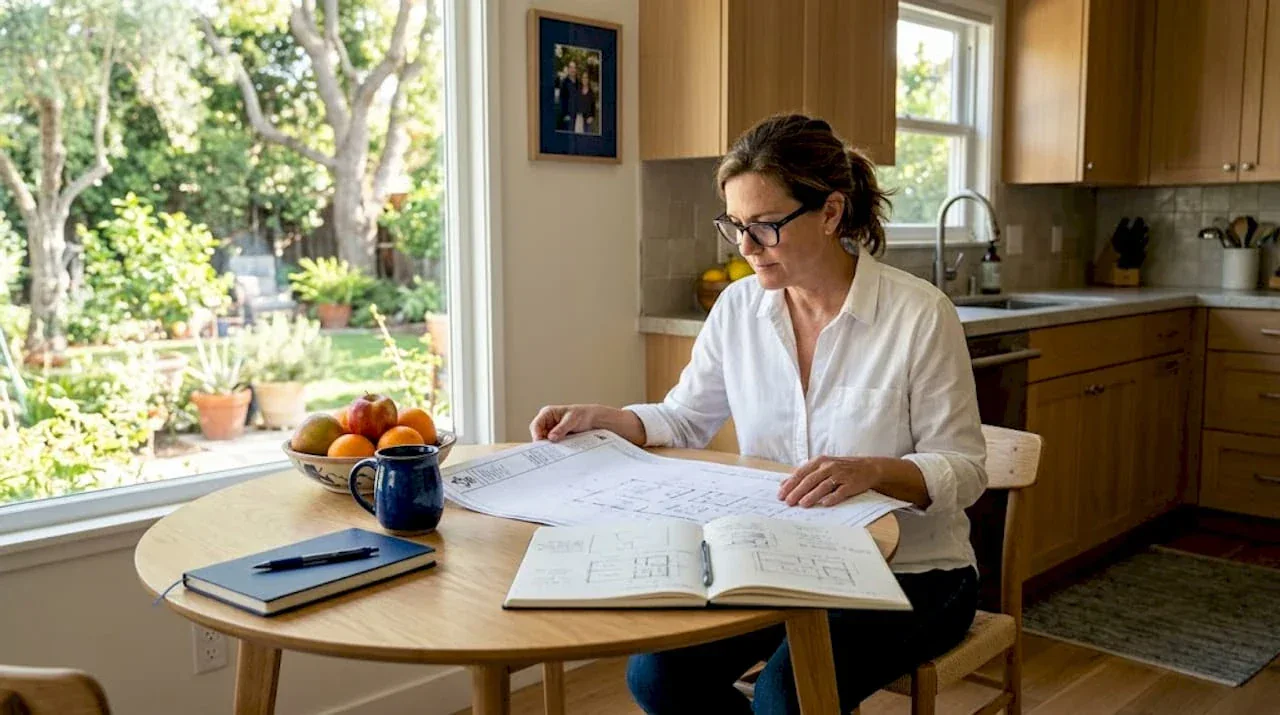
- Pull your parcel dimensions from the assessor’s map or a recent survey.
- Subtract front, side, and rear setback distances (these vary by jurisdiction and sometimes by ADU type).
- Mark any recorded easements, which often eliminate buildable area even inside otherwise legal setbacks.
- Apply your local lot-coverage percentage to see how much footprint you have left.
- Compare that footprint against your target unit size.
A tight envelope doesn’t necessarily kill the project. Garage conversions, attached additions, and junior ADUs often work on lots where a detached unit won’t fit. Reviewing the tradeoffs between detached and attached ADU layouts before committing to a footprint saves a redesign later.
Pro Tip: Sketching the buildable envelope early, before ordering full drawings, is one of the cheapest insurance policies in the entire process. Getting the geometry wrong after paying for engineered plans is a far more expensive fix.
What Utility Capacity Does an ADU Actually Need?
Utilities fail more ADU projects than zoning does, mostly because homeowners assume capacity exists until a contractor shows up and finds otherwise.
- Water: Check meter size and whether your jurisdiction requires a separate meter for the ADU.
- Sewer: Confirm the lateral’s invert depth allows gravity flow from the new unit; older laterals sometimes need replacement.
- Electrical: Check panel amperage. A 100-amp panel serving an existing house often can’t absorb a new unit without an upgrade.
- Gas: Verify meter capacity if the ADU will add a furnace, water heater, or range.
- Telecom: Confirm existing conduit or overhead access reaches the new structure’s location.
Utility companies and public works departments will often confirm capacity and issue documentation before you finalize design, which avoids redesigning connections after drawings are done. Ask specifically whether a separate meter is required or whether sub-metering off the main house is allowed.
What Site Conditions Affect ADU Foundation and Permitting?
Slope, soil, and drainage decide what kind of foundation you need and whether your project triggers extra engineering review.
- Slope: Measure grade change across the footprint. Steeper lots commonly require geotechnical reports or engineered foundations once slope crosses local thresholds.
- Drainage: Show drainage arrows and downspout locations on your site plan; jurisdictions increasingly expect positive drainage away from structures and may require a grading plan once earthwork passes a set volume, county checklists indicate grading plans may be required if earthwork exceeds local thresholds…
- Soil: Note visible signs of expansive or unstable soil; a geotechnical report may be required before foundation design.
- Hazard zones: Check FEMA flood maps, state fire severity zone maps, and fault-zone overlays for your parcel. Each can add review steps or design requirements.
Do You Have Room for Construction Equipment to Reach the Site?
Access problems surface late and cost the most when they do. Backyard readiness checklists consistently flag equipment access as an early gatekeeper, and for good reason.
- Confirm roughly 8 to 10 feet of horizontal clearance and about 12 feet of vertical clearance for skid steers, boom lifts, or delivery trailers.
- Check whether a curb or driveway permit is needed for staging materials or equipment.
- Plan temporary fencing and protection for existing pavers, irrigation, and landscaping along the equipment path.
- If a neighbor’s property offers the only viable access route, start that conversation early rather than after permits are issued.
Pro Tip: If clearance is missing on all sides, modular delivery or a crane set becomes the fallback, and both options add real cost. Confirm access before you commit to a construction method, not after.
What Documents Does a Permit-Ready ADU Site Plan Need?
Permit reviewers reject incomplete submittals more often than they reject bad designs. San Francisco’s ADU checklist spells out exactly what a compliant site plan includes, and most jurisdictions expect the same core items.
Site plan must show:
- Property lines and dimensions to existing and proposed structures
- North arrow and scale
- All existing and proposed structures, including the main house
- Setback distances on all sides
- Drainage arrows and downspout locations
- Utility connection points (water, sewer, electrical, gas)
- Lot-coverage table showing existing and proposed percentages
Plan set must include:
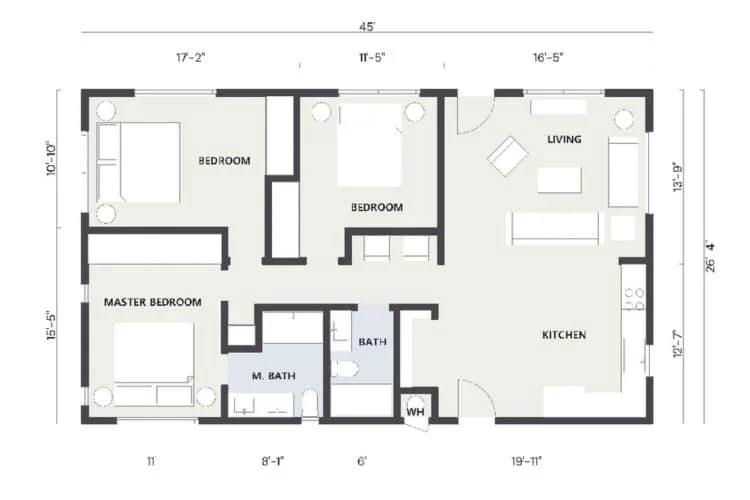
- Floor plans with room dimensions and fixture counts
- Elevations on all four sides
- Structural sections and framing details
- Title 24 energy compliance documentation, often a CF1R or H002 form
- Smoke and carbon monoxide detector locations and egress paths
Administrative paperwork:
- The completed municipal checklist itself, signed
- Expedited plancheck form where your jurisdiction offers one
- Design professional stamp and signature on structural sheets
- Sheet numbers referenced next to each checklist item, showing reviewers exactly where a requirement is addressed
Assembling permit-ready drawings is detailed enough that a dedicated permit drawings checklist is worth working through line by line before submittal.
How Long Does ADU Permit Review Take and What Does It Cost?
Expedited plancheck programs exist specifically to reward complete submittals. Los Angeles County’s expedited ADU plancheck program requires the checklist filled out, a complete plan package, and the permit application uploaded as a single combined PDF before a project even qualifies for faster review. Sloppy or partial submittals get bounced back to standard review timelines.
Site fixes carry their own cost swings:
- Sewer lateral replacement: a meaningful line item, especially on older properties
- Electrical panel upgrades: common when an existing 100-amp panel can’t serve a new unit
- Retaining walls or regrading: cost scales fast with slope and soil conditions
- Tree or root mitigation: often required when roots encroach on the buildable envelope
Build a 10 to 20 percent contingency into your budget and add schedule float for utility coordination and inspection windows. A realistic ADU timeline helps set expectations before you’re locked into a build schedule.
When to DIY the Assessment and When to Call a Professional
You can reasonably handle several checks yourself: pulling zoning and parcel data online, measuring your lot and sketching setbacks, photographing utility meters and panel labels, and walking the site for obvious slope or drainage issues.
Hand off the rest. Structural engineering, grading and drainage design, Title 24 compliance documentation, and plan stamping all require a licensed professional, and skipping that step is how projects get rejected at plan check. Uni Construction’s feasibility checklist covers the California-specific version of this process in more depth.
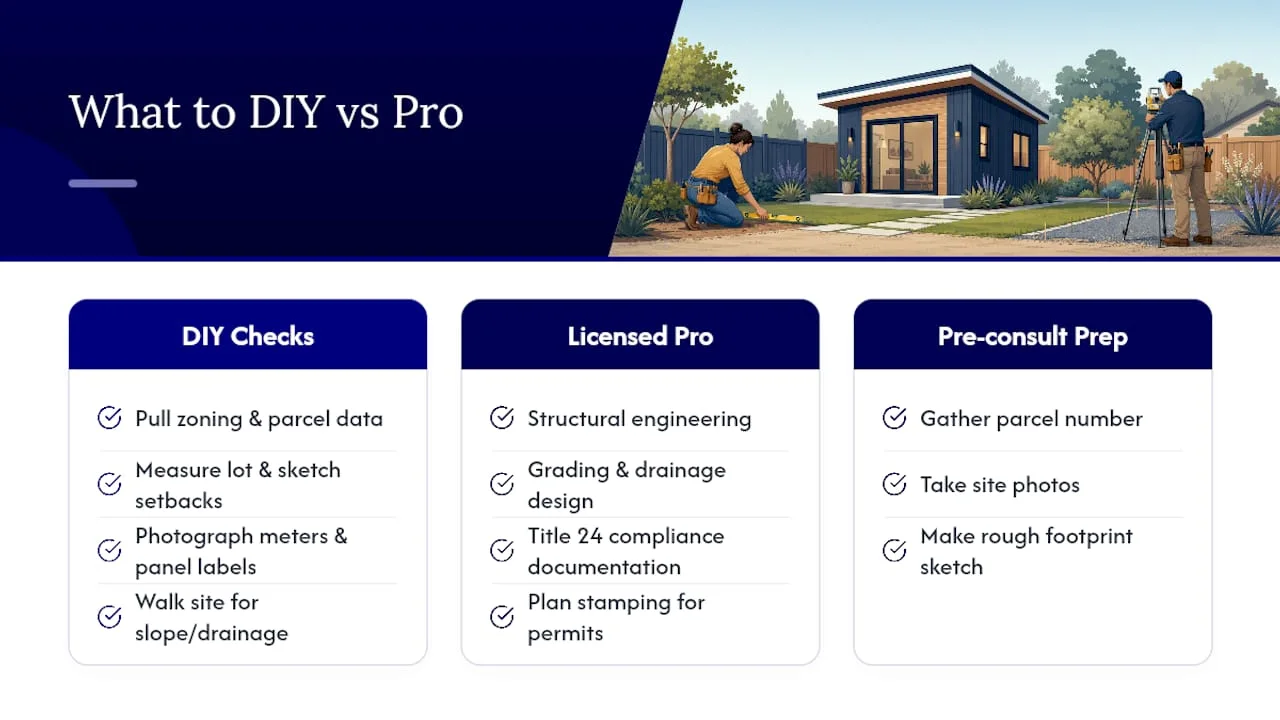
Before a consult, gather your parcel number, site photos, and a rough footprint sketch. That prep alone often cuts a first-pass quote turnaround significantly, since the design team isn’t starting from zero.
How Do Existing Trees and Landscaping Affect ADU Placement?
Mature trees are one of the most overlooked constraints on a buildable envelope. Many cities protect specific species, oak trees being the most common example across California jurisdictions, and removing or even trimming a protected tree without a permit can stall or kill a project outright.
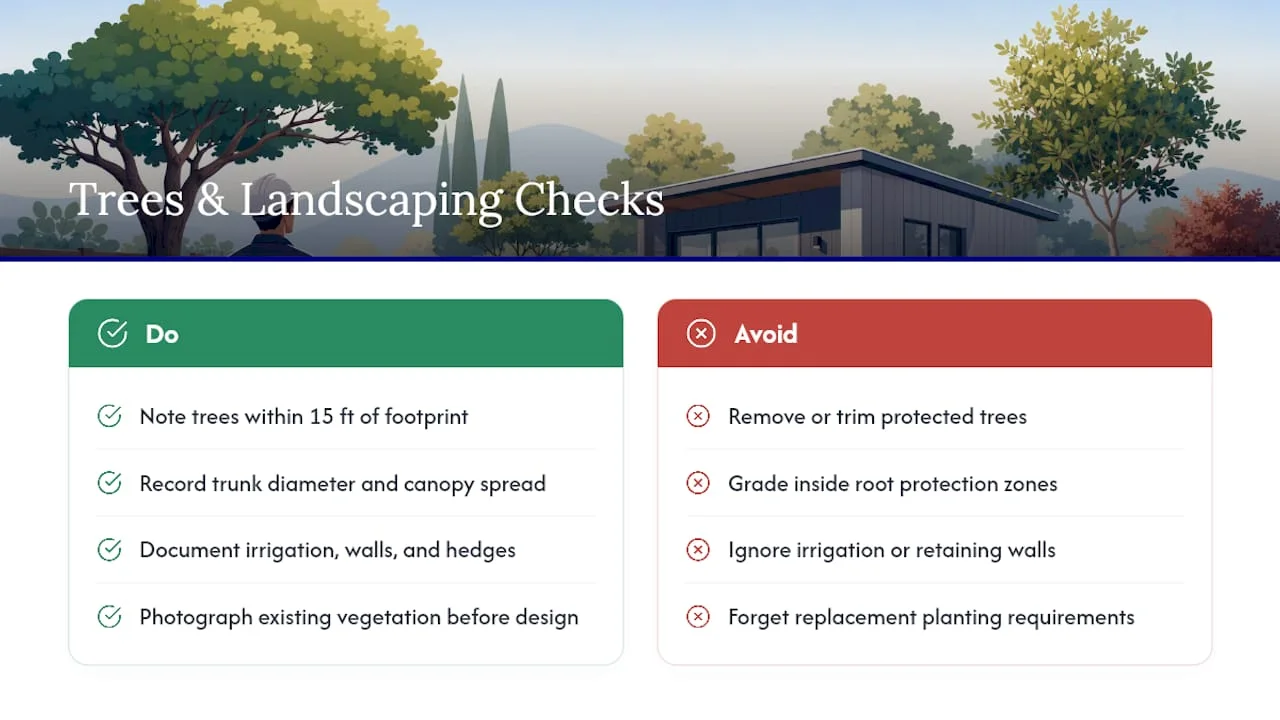
Walk the lot and note every tree within 15 feet of your intended footprint, along with trunk diameter and canopy spread. Root zones extend well past the visible canopy, and grading or foundation work inside that root protection zone can trigger a separate tree permit review, even when the ADU itself is otherwise compliant. Irrigation lines, retaining walls made of stone or timber, and mature hedges along property lines also affect where equipment can stage and whether a fence needs temporary removal during construction.
Don’t overlook the reverse problem either: landscaping you’ll need to add back. Grading changes drainage patterns, and a new structure often requires replacement planting to meet impervious-surface or tree-replacement ordinances after construction. Some jurisdictions require a landscaping plan as part of the permit set specifically to address this, particularly when mature vegetation is removed to make room for the unit.
Photograph existing vegetation before you start design work. That documentation protects you if a dispute arises later about what was removed versus what was already dead, damaged, or diseased before construction began.
Does Your Neighborhood Have ADU Restrictions Beyond Zoning?
Zoning tells you what the city allows; for details on regional compliance, consulting an ADU builder in Maryland can provide guidance tailored to local regulations. It doesn’t tell you what your neighborhood association, historic overlay, or design review board might still restrict on top of that.
Historic districts frequently impose design review requirements that standard zoning doesn’t touch, things like matching roof pitch, exterior materials, or window placement to the historic character of the block. A detached ADU that’s fully code-compliant under base zoning can still get rejected or delayed at a design review commission if it clashes visually with the district’s standards. Check whether your property sits inside a designated historic district or conservation overlay before finalizing any exterior design choices.
HOAs and CC&Rs add another layer entirely, and they’re often stricter than the city. Some HOA agreements prohibit detached structures outright, cap the number of dwellings per lot, or require board approval for anything visible from the street. Local ADU laws frequently override HOA bans on ADUs themselves in principle, but design review authority over aesthetics can still survive, so read your CC&Rs directly rather than assuming state ADU policy erases every private restriction.
Neighborhood-specific overlay zones, sometimes tied to view corridors, coastal proximity, or hillside grading ordinances, can also impose height limits or setback rules stricter than the citywide default. These overlays rarely show up on a basic zoning lookup, so ask your planning contact directly whether any specific plan or overlay district applies to your parcel number before you commit to a design.
What Are the Parking Rules for Adding an ADU?
Parking is one of the few areas where recent state-level ADU reforms have significantly loosened requirements, but “loosened” doesn’t mean “eliminated” everywhere.
Many jurisdictions now waive replacement parking requirements when the ADU sits within a set distance of public transit, or when the ADU is created from an existing structure like a garage conversion. Outside those conditions, some cities still require one off-street parking space per ADU, and if your project removes an existing garage or carport to make room for the unit, you may need to show a replacement space elsewhere on the lot.
Check your specific municipal code rather than assuming statewide reform applies uniformly. Some cities added local exceptions or clarified how “transit proximity” gets measured, and that measurement can be the difference between needing a parking space and not.
If parking is required, factor it into your buildable envelope calculation early. A required parking space competes for the same square footage as your setback-adjusted buildable area, and homeowners frequently discover the conflict only after a floor plan is already drawn. Note on your site plan exactly where any required parking space will sit, and confirm the dimensions meet your city’s minimum stall size before submittal.
Could Protected Species or Habitat Rules Affect Your ADU Site?
Environmental review isn’t usually the first thing homeowners think about for a backyard project, but certain lots trigger it regardless of size.
Properties near wetlands, riparian corridors, or mapped habitat for a protected species can fall under state or federal environmental review even for a small accessory structure. California properties near coastal zones, for example, may also fall under Coastal Commission jurisdiction, which layers an entirely separate review process on top of standard local permitting.
Check your city or county’s environmental resource maps, often available through the same GIS portal you used for zoning, for any habitat overlay, wetland buffer, or species protection zone touching your parcel. If your lot backs up to a creek, drainage channel, or undeveloped hillside, treat that as a flag worth investigating rather than assuming it doesn’t apply because the ADU itself is small.
When a habitat restriction does apply, it usually adds a biological assessment or a modified construction timeline (to avoid nesting seasons, for instance) rather than blocking the project outright. Building that potential timeline shift into your schedule early keeps a manageable delay from turning into a frustrating surprise mid-construction.
How Much Should You Budget for Site Work Before Design Even Starts?
Site conditions drive a bigger share of ADU cost variance than most homeowners expect going in, often more than finish selections or unit size.
Start your preliminary estimate by separating two cost buckets: the unit itself and the site work required to make the lot buildable. A flat, accessible lot with existing utility capacity might need minimal site work. A sloped lot with an undersized sewer lateral and a 100-amp panel serving an older house needs grading, a lateral replacement, and a panel upgrade before the ADU foundation is even poured, and each of those is its own line item with its own contractor.
Get rough numbers for the site-specific risks you identified earlier in the assessment: slope requiring retaining work, soil requiring a geotechnical report and engineered foundation, utility upgrades, and tree or root mitigation near the footprint. These numbers won’t be final until a contractor walks the site, but even a rough range lets you decide whether the project pencils out before paying for full engineered drawings.
Add your contingency on top of that combined estimate, not just the construction budget. Site-related surprises, an unexpectedly shallow sewer lateral, soil that needs deeper footings than assumed, tend to surface during excavation rather than during design, which is exactly why the contingency exists in the first place.
Why the Standard ADU Advice Skips the Part That Actually Delays Projects
Most ADU guides spend their word count on floor plans and finishes. That’s backwards. The projects that stall for months almost never stall because someone picked the wrong countertop. They stall because nobody checked sewer lateral depth, nobody measured equipment clearance, or nobody caught a protected oak sitting inside the footprint until a contractor showed up.
The conventional advice treats site assessment as a formality before the “real” design work begins. It’s the opposite. A rejected submittal at plan check costs more time than a slow, careful site walk ever will, and most rejections trace back to incomplete checklists or missed utility capacity, not bad architecture.
If you take one thing from this whole process, prioritize the buildable envelope and utility capacity before anything else. Everything downstream, unit size, layout, even whether you go detached or attached, depends on those two answers. Get them wrong and you redesign. Get them right early and the rest of the process moves the way it should.
, Uni Construction
How Uni Construction Turns a Site Assessment Into a Permit-Ready Package
Once you’ve worked through the checklist, the fastest path forward is handing the site details to a team that already knows what plan checkers want to see. There are companies offering feasibility checks, permit-ready drawings, structural engineering, and permit coordination for ADUs, additions, and remodels, built around the same site-readiness questions covered here: zoning eligibility, buildable envelope, utility capacity, and site conditions.
A first consult moves faster when you arrive with your parcel number, a few site photos, and a rough footprint idea. That’s often enough for a design team to flag obvious red flags early instead of discovering them mid-design. From there, the team handles structural engineering, Title 24 documentation, and the plan-set details that permit reviewers actually check line by line.
If your lot checked out on zoning, setbacks, and utilities, the next step is a feasibility consult through Uni Construction’s Los Angeles design page to turn that groundwork into permit-ready drawings.
Sources
- ADU Checklist.V4.2
- ADU Project Process | City of San José
- Is Your Backyard Ready for an ADU? Site Checklist