

Yes, your addition almost certainly needs Title 24 compliance if it increases your home’s conditioned floor area or conditioned volume by even a few square feet. The single next step is classification: determine your exact addition size and whether the project counts as an addition, an attached ADU, or a detached ADU, since that decision sets your entire compliance path under the 2025 code update effective January 1, 2026.
TL;DR:
- Additions larger than a few square feet automatically trigger Title 24 compliance, especially if they expand conditioned space, volume, or outdoor lighting.
- Classifying attached versus detached ADUs is critical because attached units follow addition rules, while detached structures are usually treated as new construction.
- The prescriptive compliance route is faster and suitable for additions under 700 square feet, relying on fixed tables for insulation and glazing, while performance modeling offers design flexibility for complex projects.
- Mandatory measures include minimum insulation, air sealing, high-efficacy lighting, and HVAC efficiency, with some requiring HERS verification before permit approval.
- Accurate coordination between design, energy modeling, and documentation from the start reduces delays and errors during plan check, preventing costly redesigns and compliance issues.
Does Your Addition or ADU Trigger Title 24 Additions Requirements?
Title 24, Part 6 defines an addition as any project that increases conditioned floor area, conditioned volume, or illuminated outdoor area attached to a residence. The Building Energy Efficiency Standards apply the moment you cross that line, whether you’re adding a bedroom, bumping out a kitchen, or converting a garage into livable space. A bathroom remodel that doesn’t expand the building’s footprint usually stays outside Part 6’s addition rules, but the second you enclose a patio or extend a wall, you’re in scope.
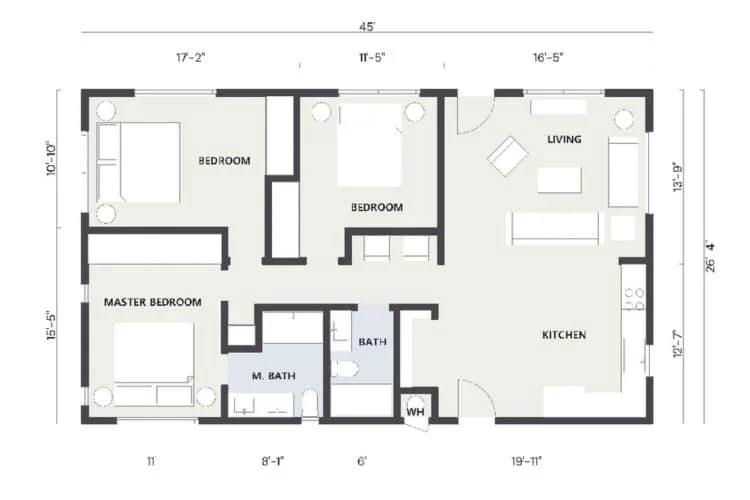
Classification gets trickier with ADUs, and this is where a lot of homeowners get tripped up. An attached ADU, sharing a wall or roofline with the primary residence, often gets treated under the addition provisions of Part 6. A detached ADU, standing as its own structure in the backyard, typically falls under new construction rules instead, which carry different mandatory measures and sometimes stricter PV expectations. Garage conversions sit in a gray zone depending on whether the garage was already conditioned space. Confirming this with your local building department before you finalize drawings saves real time, because reclassifying midway through plan check can force a redesign of your entire compliance approach.
Projects that commonly trigger Title 24 compliance include:
- Room additions that expand conditioned floor area, even by 100 square feet
- Garage-to-living-space conversions
- Attached ADUs built onto an existing home
- Sunroom or patio enclosures that become heated or cooled space
- Second-story additions over existing conditioned rooms
Common exceptions include minor exterior repairs, reroofing without insulation changes, and cosmetic work that doesn’t touch the building envelope or mechanical systems. Even then, if your scope brushes against insulation, windows, or ductwork, check with your local authority having jurisdiction before assuming you’re exempt.
Prescriptive vs. Performance: Picking Your Compliance Path
You have two ways to prove Title 24 compliance for an addition: prescriptive and performance. Both require the same mandatory measures underneath, but they differ sharply in flexibility, paperwork, and cost.
The prescriptive path works off fixed tables. Your addition’s insulation, glazing area, and equipment efficiency have to meet specific numbers based on climate zone and square footage. No energy modeling software, no simulation, just checking boxes against a published table in Chapter 9 of the compliance manual. Most additions under 700 square feet go this route because it’s faster to document and cheaper to certify.
The performance path uses whole-building energy modeling to show your design achieves an equivalent or better energy budget than a prescriptive baseline, even if individual components don’t hit every prescriptive number. This route makes sense when you want oversized windows on a view wall, an unusual roof pitch that limits insulation depth, or a design that simply doesn’t fit neatly into the prescriptive boxes.
Here’s how the trade-offs typically break down:
- Prescriptive favors speed and predictability, works well for standard additions, and needs no software modeling, but locks you into rigid glazing and insulation limits.
- Performance offers design freedom, lets you trade weaknesses in one area for strengths in another, but adds modeling costs and a longer document trail.
- Both paths still require the same mandatory measures for lighting, air sealing, and ducts, regardless of which path you pick.
Choose your path early, ideally at the same time you’re finalizing floor plans, not after windows are already ordered. An energy consultant modeling your design in parallel with your architect catches conflicts, like a wall assembly that can’t hit its R-value target, while changes are still cheap to make. Waiting until permit submittal to figure out your compliance approach is one of the most common reasons additions bounce back at plan check.
Prescriptive Thresholds by Addition Size: Glazing, Insulation, and QII Rules
Size drives almost everything on the prescriptive path. The 2025 California Energy Code splits additions into three conditioned floor area (CFA) bands, and each band carries its own glazing cap, insulation targets, and verification requirements.
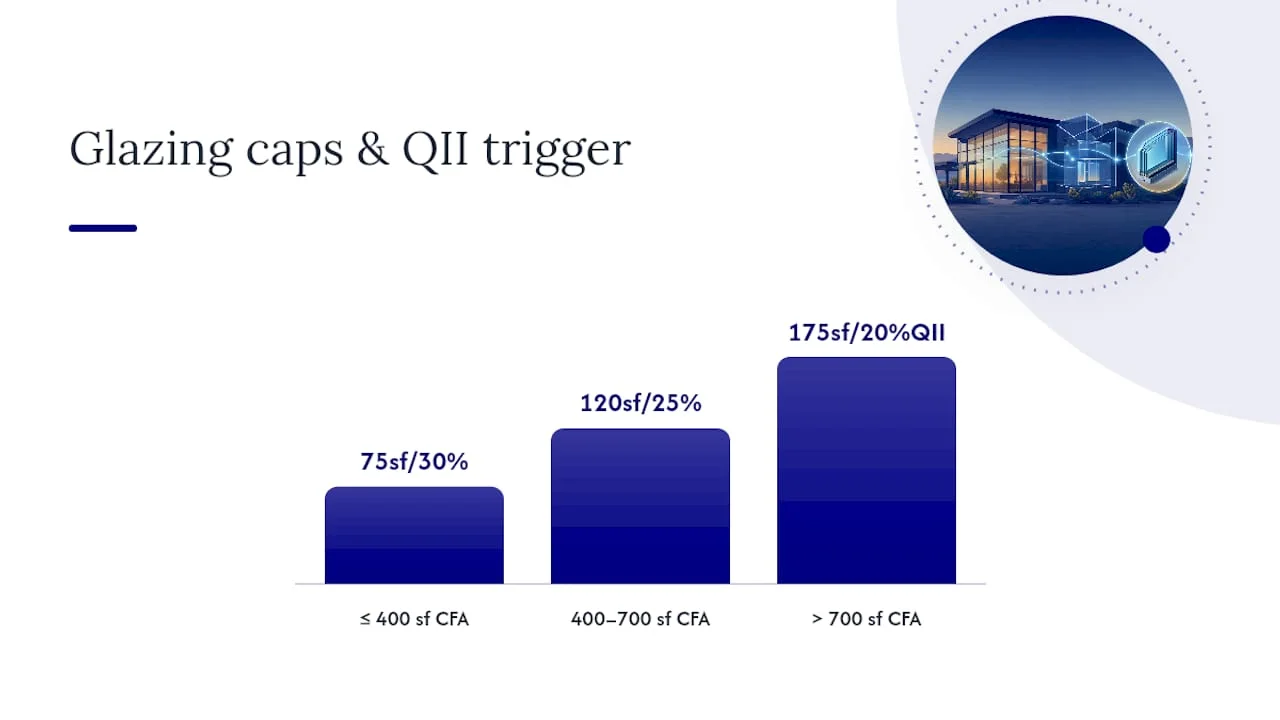
Additions of 400 square feet or less get the most generous glazing allowance relative to size: up to 75 square feet of glazing or 30% of the addition’s CFA, whichever is less. Additions between 400 and 700 square feet drop to 120 square feet of glazing or 25% of CFA. Additions larger than 700 square feet cap out at 175 square feet or 20% of CFA. In all three bands, climate zones with heavy solar heat gain often impose tighter west-facing glazing limits, since west windows in the late afternoon are where cooling loads spike hardest.
Insulation values shift by climate zone, but the general pattern for ceilings and rafters lands around R-38 in cooler zones and R-30 in warmer coastal or mild zones, with rafter assemblies commonly targeting R-22 where roof depth allows it. Wall cavities being extended from an existing structure often get some flexibility, since you’re matching new framing to an old wall, but the insulation still has to hit the applicable cavity R-value for your climate zone rather than just matching whatever’s already there.
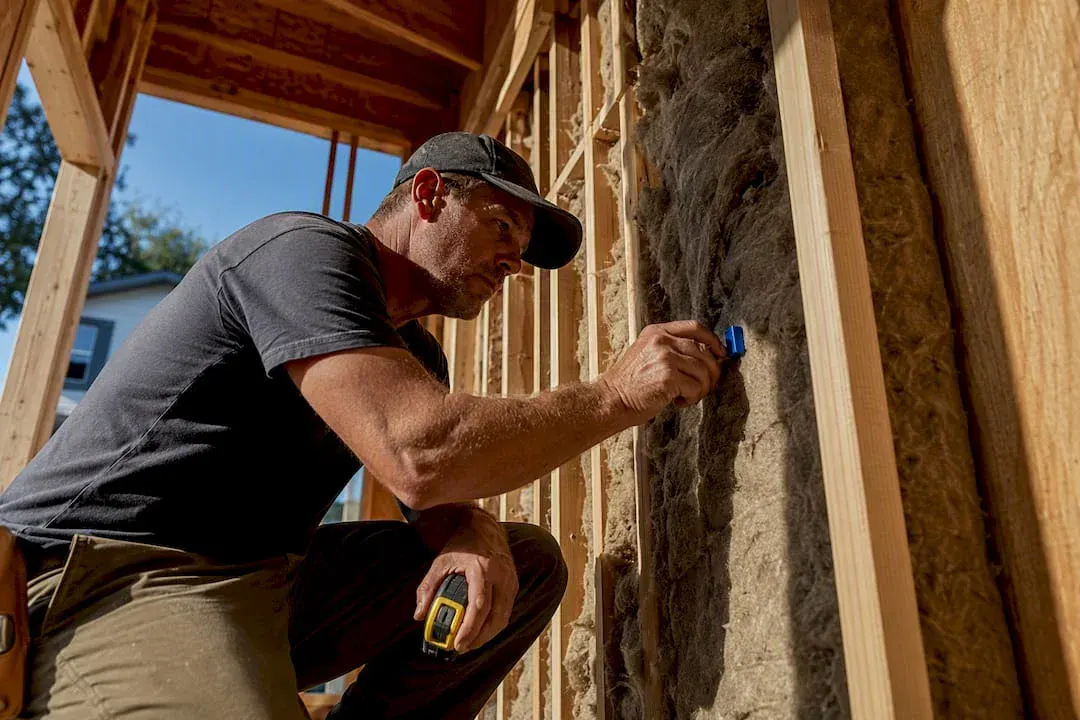
Quality Insulation Installation, or QII, becomes mandatory for additions over 700 square feet in most cases. QII isn’t just “install insulation.” It requires a HERS rater to physically verify installation quality, checking for gaps, compression, and proper contact with sheathing, because poorly installed insulation can lose 30% to 50% of its rated performance even when the material itself meets the R-value on paper. The exception that trips people up: if you’re converting existing unconditioned space, like a garage or an enclosed porch, into conditioned space, and the existing air barrier is intact and documented, some QII checks may not apply the same way they would in new framing. That distinction can genuinely reduce inspection burden, but only if you document the existing air barrier’s condition before construction starts, not after the fact when an inspector asks for proof.
Radiant barriers show up as a requirement in specific climate zones, mostly the hotter Central Valley and desert zones, where attic heat gain drives cooling loads hard enough that the code mandates a reflective barrier under the roof deck. Coastal zones with milder summers typically skip this requirement entirely. Because these thresholds are climate-zone dependent, pulling your specific zone number before finalizing any envelope decision is worth the five minutes it takes.
Mandatory Measures, HERS Verification, and Where Solar Fits In
Some requirements apply no matter which compliance path you choose, and skipping them is the fastest way to fail plan check regardless of how well your prescriptive numbers look on paper.
Mandatory measures that apply to every addition include:
- Minimum insulation levels in all new envelope assemblies, walls, ceilings, and floors over unconditioned space
- Air sealing at penetrations, top plates, and window/door rough openings
- Specified lighting requirements, generally requiring high-efficacy fixtures in most rooms
- Minimum efficiency standards for any new HVAC equipment installed as part of the addition
- Duct sealing and insulation for any new ductwork serving the addition
HERS (Home Energy Rating System) verification kicks in whenever a mandatory or prescriptive feature specifically calls for field confirmation, things like duct leakage testing, QII, or refrigerant charge verification on new HVAC systems. Pro Tip: Register your HERS verification with a certified provider before you submit for permit, not after framing inspection. Plan checkers increasingly want to see the HERS registration number on your CF1R paperwork at submittal, and scrambling to register mid-construction can stall your framing inspection by a week or more.
Photovoltaic systems generally are not required for additions under any compliance approach, according to Chapter 9 guidance. This surprises a lot of homeowners who assume any Title 24 project now needs solar panels. The PV mandate applies to new residential construction, not to additions onto an existing home. Where solar rules do become relevant is when your project is actually a detached ADU treated as new construction, or when you’re adding enough new conditioned area that the local jurisdiction treats it as a substantial remodel triggering separate solar access rules under SARA and Section 150.1-C. If your project involves a detached ADU, it’s worth reading up on how solar requirements interact with ADU permits before you assume you’re exempt.
Larger additions with new nonresidential-scale mechanical systems, or additions to mixed-use properties, may also trigger commissioning requirements, meaning a qualified party has to test and document that HVAC and lighting controls actually function as designed before final sign-off. This rarely applies to a standard single-family room addition, but it becomes relevant fast if you’re adding significant conditioned square footage with complex zoned HVAC.
The Paperwork: CF1R Forms, HERS Timing, and Plan-Check Essentials
Every Title 24 addition needs a Certificate of Compliance, and picking the right form matters more than most homeowners realize.
- CF1R-ADD-01 covers prescriptive additions where you’re adding conditioned space and following the size-based tables directly.
- CF1R-NCB-01 applies when the addition is being treated under new construction budget rules, most common for detached ADUs or additions large enough to be modeled as their own energy budget.
- CF1R-ALT-02 is for alterations, situations where you’re modifying existing conditioned space (like replacing windows or upgrading insulation) without necessarily expanding the footprint.
Beyond the CF1R, expect CF2R forms during construction for installation certificates, confirming things like insulation R-value and installer sign-off, and CF3R forms for field verification and diagnostic testing tied to HERS-required items like duct leakage or QII. These aren’t optional add-ons. Plan checkers and building inspectors both expect to see them at the appropriate phase, and missing a CF3R at final inspection can hold up your certificate of occupancy.
HERS registration timing matters more than people expect. Registering the required verification items with an approved HERS provider before permit submittal, rather than waiting until framing is underway, keeps your CF1R paperwork consistent from day one. Your HERS provider directory is available through any state-approved HERS provider organization, and your energy consultant or Title 24 preparer typically handles this coordination directly.
For plan check itself, make sure your drawings explicitly call out insulation R-values by assembly, window U-factor and SHGC ratings on the window schedule, and specific equipment model numbers for HVAC and water heating. A CF1R that says “R-30 ceiling” but drawings that just say “insulate per code” without a number is a near-guaranteed correction request. Matching the numbers exactly, drawing to CF1R to CF2R, is the single biggest lever you have to move plan check faster.
Where Additions Actually Get Rejected at Plan Check
The most common cause of plan-check delay isn’t a design flaw. It’s a mismatch between the Title 24 energy report and the permit-ready construction drawings, typically insulation callouts, window performance ratings, or HVAC equipment specs that don’t match number-for-number between the two documents. A window schedule listing a 0.30 U-factor window while the CF1R was modeled with 0.28 sounds trivial, but it forces a plan checker to stop and flag the discrepancy, and that single flag can add two to three weeks to your review cycle.
The fix is sequencing, not more paperwork. Bring your energy modeler in at the schematic design phase, not after construction drawings are finished. If your architect locks in window sizes and wall assemblies before the energy consultant has modeled the addition, you risk designing something that either fails prescriptive compliance outright or requires expensive last-minute substitutions to pass. Coordinating energy modeling within a one-to-two week window early in design, rather than treating it as a final step before permit submittal, keeps your drawings and your compliance documents speaking the same language from the start.
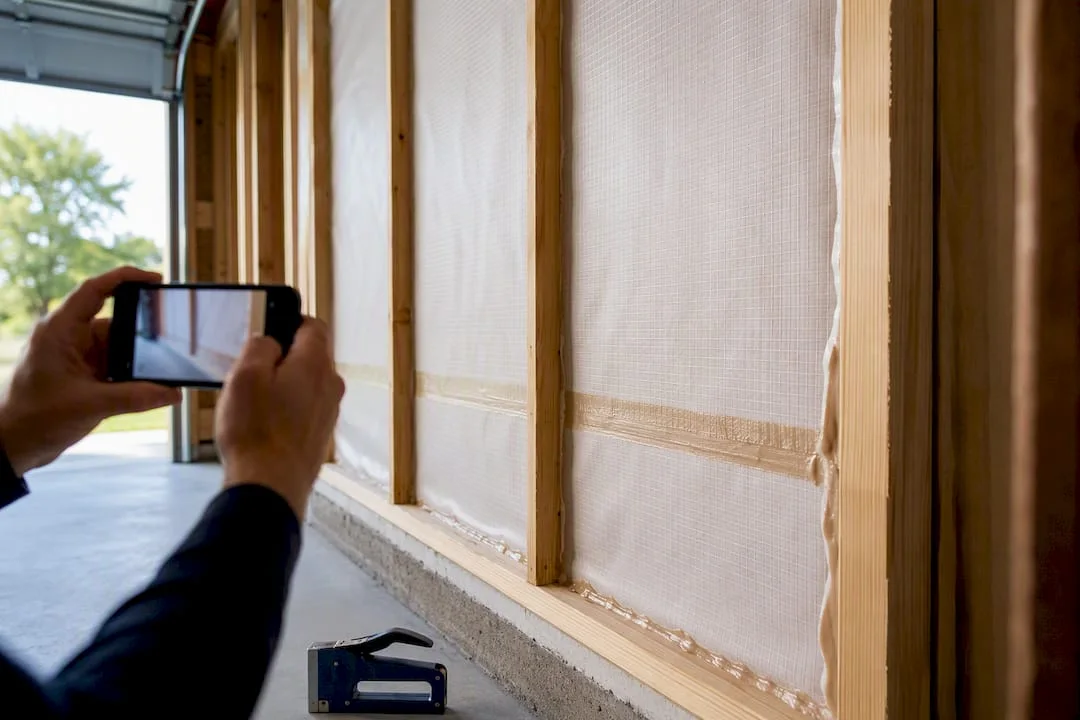
Conversions from unconditioned to conditioned space carry their own documentation quirk. If you’re finishing a garage or enclosing a porch and the existing air barrier is staying in place, photograph it and detail it clearly before construction begins. That documentation is often what lets you claim a QII exception, and without it, an inspector has no way to verify the barrier was ever there.
Pro Tip: Order your permit submittal package the same way plan checkers read it: CF1R first, then window and equipment schedules, then framing details showing insulation assemblies. Reviewers process submittals faster when the paperwork mirrors their own checklist order, and a logically ordered package tends to draw fewer clarifying comment rounds.
A short checklist for reducing review cycles:
- Match every number between the CF1R and the drawings before submittal
- Confirm ADU or addition classification with the AHJ in writing, not just verbally
- Document existing air barriers with photos before covering them with new work
- Register HERS verification before, not during, construction
A Step-by-Step Path Through Title 24 Compliance
Getting from a napkin sketch to a signed-off certificate of compliance follows a fairly consistent sequence, whether you’re adding 200 square feet or building out a full attached ADU.
- Pre-design. Confirm your addition’s classification (addition vs. attached ADU vs. detached ADU) with your local building department, identify your climate zone, and gather existing drawings or as-builts if the house predates digital plans.
- Design. Coordinate your envelope assemblies, window schedule, and mechanical equipment specs with your compliance path in mind. Decide prescriptive or performance before finalizing glazing sizes, since a late change to window area can blow past your size band’s glazing cap.
- Modeling and paperwork. Complete the appropriate CF1R form, register any required HERS verification items with a certified provider, and prepare the documentation package for submittal to your authority having jurisdiction.
- Construction and verification. Build to the approved plans, and when HERS-required items are present, schedule the QII inspection or duct leakage test at the correct construction phase, not after drywall closes access to the assemblies being tested.
- Post-approval. Collect your final Certificate of Compliance and keep every CF1R, CF2R, and CF3R on file. Future buyers, appraisers, and even your own insurance carrier may ask for this documentation years later.
Each phase has a natural owner. Your architect or designer typically drives pre-design and design. Your energy consultant or Title 24 preparer owns the modeling and CF1R. Your contractor and HERS rater handle construction-phase verification. The handoffs between these three parties are exactly where miscommunication creates the plan-check delays covered above, so naming who owns each deliverable at kickoff, rather than assuming it’ll sort itself out, is worth the extra conversation up front.
How Uni Construction Approaches Title 24 for Additions and ADUs
Title 24 compliance generally goes smoothest when the energy consultant and the architect coordinate early, rather than trading documents after the fact.
Aligning energy modeling with permit-ready drawings early cuts down the back-and-forth that stalls plan check, because the numbers on the CF1R match the numbers on the drawings before a plan checker ever opens the file. That coordination is where a lot of projects either save weeks or lose them, depending on whether the design and modeling teams were sequenced correctly from the start.
If you’re weighing whether your project should be structured as an attached addition or a detached ADU, that classification decision shapes everything downstream, including which CF1R form applies and whether solar rules come into play. Reviewing completed project examples and talking through your specific lot and floor plan with a design team before locking in drawings tends to surface these issues while they’re still cheap to fix.
, Uni Construction
Getting Your Addition Design and Title 24 Compliance Handled Together
Homeowners tackling this alone usually end up hiring an architect, then a separate energy consultant, then discovering mid-project that the two never compared notes. Some design-build firms offer ADU design, Title 24 energy modeling coordination, HERS provider coordination, and permit submittal support as one connected process, so the window schedule and CF1R can be coordinated from the first draft rather than reconciled after the fact.
A typical engagement starts with a scoping conversation about your lot, your addition or ADU goals, and your target size band, followed by design development that factors in prescriptive thresholds from day one instead of retrofitting compliance after floor plans are locked. Deliverables include permit-ready drawings, coordinated CF1R documentation, and a plan-check submittal package built to reduce correction cycles. If you’re ready to move past research into an actual design conversation, visit the ADU design services page to schedule a scoping consultation and get a clear sense of size, cost, and compliance path.
Where to Verify These Title 24 Rules Yourself
Code details shift with each triennial cycle, so cross-checking primary sources before finalizing your project is worth the extra ten minutes.
- The California Energy Commission’s Building Energy Efficiency Standards page for program updates and adoption timelines
- Chapter 9 of the compliance manual for the full prescriptive tables and addition-specific compliance approaches
- The 2025 California Energy Code, Title 24 Part 6 for climate-zone-specific R-values and glazing rules
- ENERGY STAR and DOE Energy Saver guide for selecting compliant window products
Sources
FAQ
Title 24, Part 6 requires additions that increase conditioned floor area or volume to meet minimum insulation, glazing, and mechanical efficiency standards, verified through either the prescriptive tables or a performance energy model.
Under the 2025 code cycle effective January 1, 2026, window area is capped by addition size, ranging from 75 square feet or 30% of conditioned floor area for additions up to 400 square feet, down to 20% of CFA for additions over 700 square feet, with window U-factor and SHGC ratings set by climate zone.
Minor exterior repairs, reroofing without insulation changes, and cosmetic work that doesn’t touch the building envelope, insulation, or mechanical systems are typically exempt, though local jurisdictions confirm exceptions case by case.
Commissioning, formal testing and documentation that HVAC and lighting controls perform as designed, mainly applies to larger additions with complex mechanical systems or nonresidential-scale projects rather than a standard single-family room addition.